The model I used was a friend of mine called Becky, she has only been modelling since August 2011 and already has a good professional manner, required very little direction, but responded well to the little direction I gave.
The Jewellery I used was lent to me by another friend who makes it all by hand in her spare time.
The advertising/products I was trying to advertise were, Jeans, T-Shirts, Jewellery and bags. In the images below I feel I have captured all of these aspects in one way or another. They are all unedited, straight off the camera as shot, I will edit the final images that I choose for my other module image presentation.
Looking at my research images I was aiming for a white background, but there was also a coupple of images I took inspiration from which had a black background. Time was limited for this shoot as the studio was busy, so to save swapping from a white to a black background, I decided to use the lighting in a way to give me a nice grey background.
So for the lighting I used a couple of combinations, both used 1 light quite far back (to give the grey background) but aimed straight at the model from just above head height, pointing down. This light had fitted, a Beauty dish, with a Honeycomb in the centre and a diffuser around the honeycomb.
For the 2nd lighting option I kept the same light as above, but then also added another light, to the right of the model, (as you look at the images) this was positioned lower down (about chest height) and was fitted with a barn door as shown in the image below.
My camera was set to F10, ISO100, shutter at about 1/60 and the white balance set to flash mode.


The image above is the 1st shot I took of the model, this was using the the 2 light option, with the other light hitting her left hand side, lighting up her hair and her right arm.
A simple pose, framed close to her to make the attention on her/the black top.
I gained the grey background I was after, but the image itself seemed to be a bit warm in colour temperature, I also felt the light coming from the right was to harsh, I did turn this down later on in the shoot and these images will follow.

In this image I got the model to turn more towards the light coming from the right, This gave a better more even cover of light onto her, but still I wasn't completely happy with the colour temperature of the image. In the next shot I turned off the light to the models left to see what effect this had.

So this is the result of turning off the light to the models left, Again the grey background is there, but it looks more like a mucky/dirty grey, the grey I was after was more of a light cleaner grey. This meant I was going to have to play with my camera settings. I was happy with the ISO, aperture value and shutter speed, so due to the fact that I thought the temperature wasn't quite right, I adjusted the white balance from flash to 5500K.

And this is the result of just changing the white balance, I was a lot happier with this, not only was the background a crisper cleaner grey, but also the skin tone of the model is a better colour. After this I didn't change the camera settings again.
Being happy with the overall colour representation of the images I moved onto adding in the Jewellery aspect of the shoot.
The inspiration for this image came from one of my research images, (this can be found on my blog) It was of Cat Deeley modelling for Links of London.
My model is facing the other way and I haven't cropped it as tight as the research image, but there is the option to do this when it comes to choosing and presenting my final images, with the concentration being the advertising of the Jewellery I would crop this tight to the hands, showing just the jewellery.

This is one of the next few shots where I framed it tighter to gain the focus being more on the Jewellery.
Again this shot was done with just the 1 light in front of the model and no camera settings where adjusted.

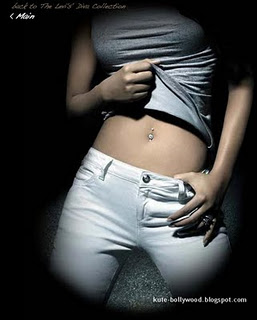
Once I was fairly happy with the Jewellery shots, I decided to add a bag into the mix as well, this is the 1st shot I took, which was from quite far back and not zoomed/framed to close onto the model, although I like this shot, If I was to do it again I would of put the model more to the right hand side of the image, I would maybe play with the camera settings as well, as the background has again gone closer to the darker/dirtier looking grey.
The difference that zooming into the model more can be seen in the image below.

With this being closer in on the model that the previous shot, the background has now become lighter and more appealing to the eye.
I think the position of the models head also give the image a better look.
The only other thing I would consider changing were I to do this shot again, is possibly move the bracelets from the hand holding the bag to the hand on her hip.

Next we changed the pose, so this time I was able to get all the aspects of the shoot into one shot. Still the lighting stayed with just the one light, but again I should of maybe opened the aperture slightly, as the detail of the bag cannot be seen and also the jeans at the bottom are a bit dark close to black. Opening the aperture may of also allowed the background to be a slightly lighter grey as well.
Again the crop of this image could be made slightly tighter in post production.

Next we went for an outfit, Jewellery and bag change. I also turned the 2nd light back on to give the images a different look/feel.
This is the 3rd shot I took of this style combination, the other 2 I don't like as much as this one, the 1st was too far zoomed out and therefore took away from it being about the products. The 2nd image the model was playing with her hair, and the light hitting it made it a bit to over exposed and again attracted away from the products being photographed.


1st image is to the left.
2nd image is to the right.
 This image was taken with the focus being on the bag and the jewellery and not so much the model.
 This is again another one taken to make the focus be on the bag and jewellery but I have changed from Landscape to Portrait. I think this is a better way of taking the shot, as it cuts out more of the background and includes a bit more of the model.

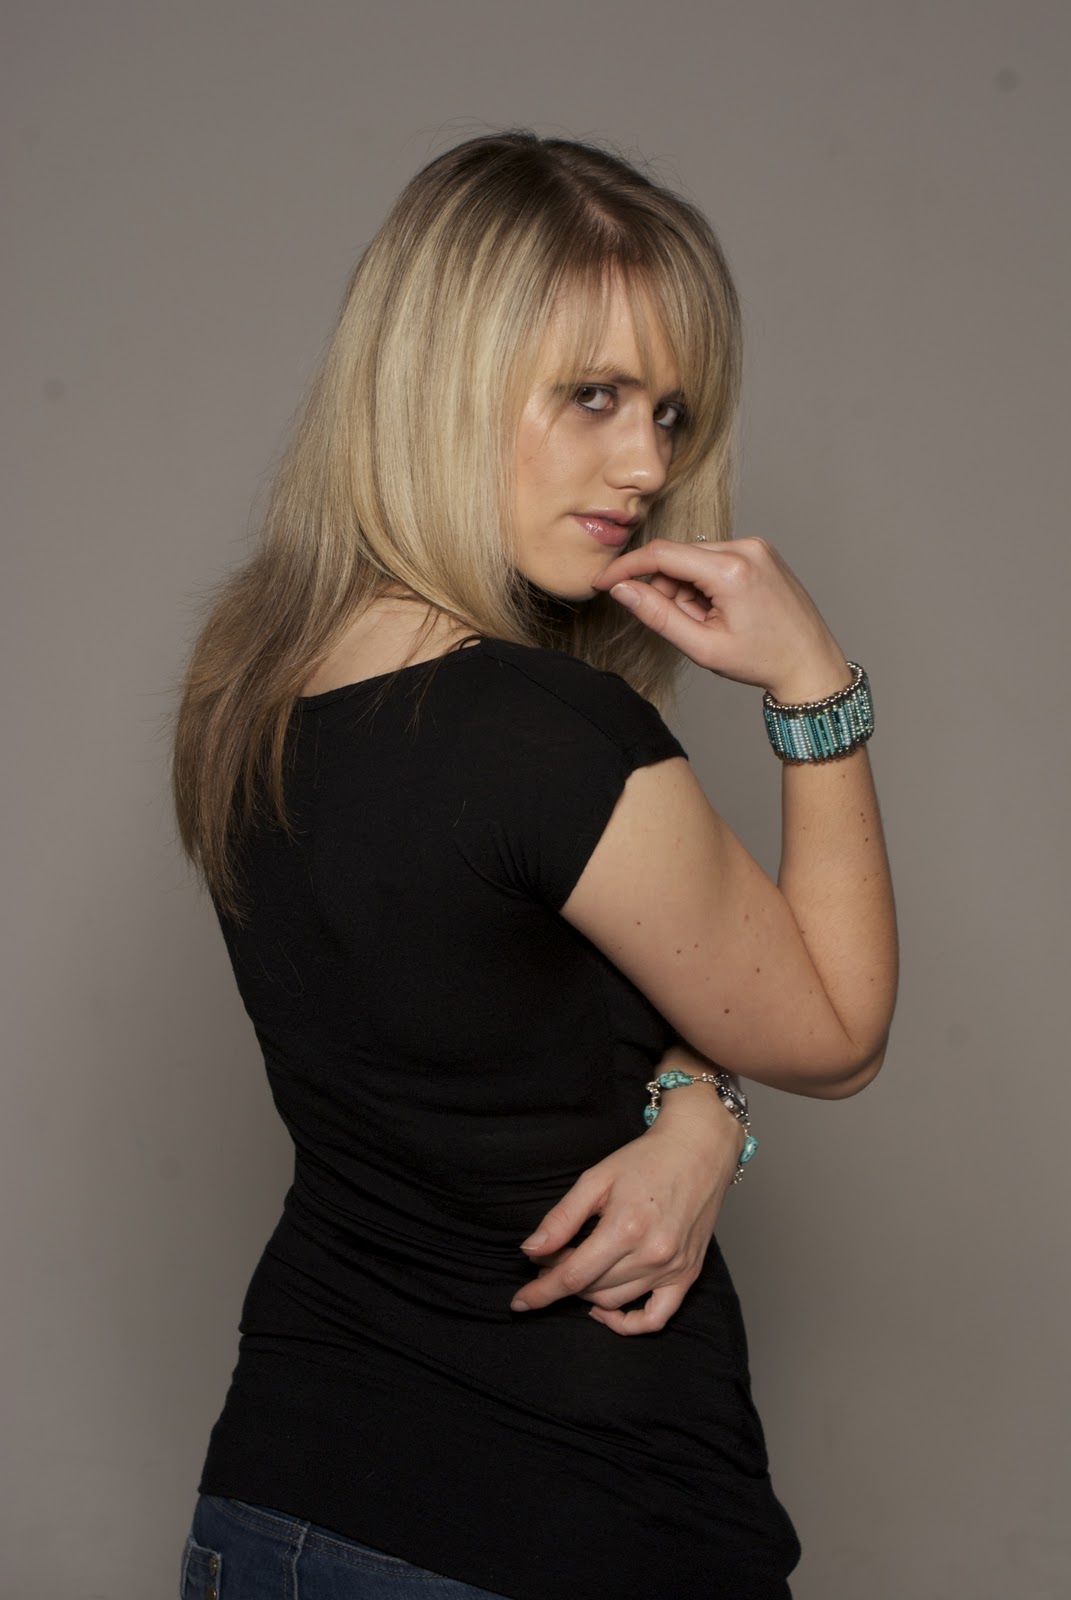
After doing a few shots with the red top we then took the bag out of the images, changed tops and added a necklace into the images.
So out of the jewellery supplied to me by my friend, we found this lovely heart shaped necklace, which went well with this top that the model brought along.
Again the light coming from the right, hitting and lighting up the models hair works well and makes these images stand out from the earlier ones that didn't have the other light in use.

Liking the outfit/necklace combination we tried various different poses, this one I like as the model is turned more towards the light, so more of her body is lit up, yet moving the arm position from behind her back to behind her head, created a nice shadowed area across her face, also a line across her chest where the light is lighting up the heart piece of the necklace well.
It is not so tightly framed but I think this also lends itself to the overall finish of the image.

This os the last shot we took with this outfit/jewellery combination, I wanted to get a full body shot so I have got the option of all the aspects of the shoot being available.
This will obviously require a crop in post production as the background scoop wasn't quite high enough and the top of it can be seen.

This is the next outfit change we went for a nice body sculptured dress, broken up with a red belt. We also changed the Jewellery again, this time to a nice multi coloured bracelet and almost matching necklace. This is the 1st shot we took and we were both fairly happy with the outcome, the only thing I wasn't sure about again was the background, it looked a little dark again.

In this image I moved the light coming from the right, so it was pointing further back behind the model and more onto the background scoop.
It has as I was hoping for lightened the background but not gone too far away from the model, so there is still the element of half light half shadow on the model herself.
The change of head position from looking at the camera to looking to the left slightly, has also created some nice shadows and well lit portions of her face/neck.

From the previous image I swapped back from Portrait to landscape, I did this as I want to try and concentrate more on the Jewellery, by getting the model to lean forward helped to move her hair from around the neck line, allowing the necklace to be seen.
Cutting the image off just below her hands, also helps draw your attention to the Bracelet.
There is of course the option of cropping this image down, so it becomes a head shot with the bottom of the image cut off just below the necklace.

This shot again I took inspiration from one of the research images, the result is pretty close, with again the only problem with the image being the background scoop being to low.
The image is designed to be advertising the bag, by putting it in an unusual position this helps make it stand out.

This is the final outfit change we went for, a nice black dress with a turquoise/ bluey green pattern/detail on the front, we went back to the 1st items of jewellery we used, using just the watch this time, as the colour of this matched the colours on the dress.
Although I like this shot, for the purpose of advertising the jewellery it wasn't quite the right pose.

This pose I thought worked better for the purpose of showing off the Bracelet, it's not only closer into the model and jewellery, but the matching colour detail on the dress can been seen better.
I think in post production I will crop it slightly to remove the hand from the bottom left hand corner.

This is one of the last images, and the last pose of the shoot. I took this in both Landscape and Portrait framing.
From the previous images we added the black heart shaped necklace again. Shot in this way almost uses the rule of 2 thirds, yet the jewellery is still there and can be seen.

This is one of the next few shots where I framed it tighter to gain the focus being more on the Jewellery.
Again this shot was done with just the 1 light in front of the model and no camera settings where adjusted.

Once I was fairly happy with the Jewellery shots, I decided to add a bag into the mix as well, this is the 1st shot I took, which was from quite far back and not zoomed/framed to close onto the model, although I like this shot, If I was to do it again I would of put the model more to the right hand side of the image, I would maybe play with the camera settings as well, as the background has again gone closer to the darker/dirtier looking grey.
The difference that zooming into the model more can be seen in the image below.

With this being closer in on the model that the previous shot, the background has now become lighter and more appealing to the eye.
I think the position of the models head also give the image a better look.
The only other thing I would consider changing were I to do this shot again, is possibly move the bracelets from the hand holding the bag to the hand on her hip.

Next we changed the pose, so this time I was able to get all the aspects of the shoot into one shot. Still the lighting stayed with just the one light, but again I should of maybe opened the aperture slightly, as the detail of the bag cannot be seen and also the jeans at the bottom are a bit dark close to black. Opening the aperture may of also allowed the background to be a slightly lighter grey as well.
Again the crop of this image could be made slightly tighter in post production.

Next we went for an outfit, Jewellery and bag change. I also turned the 2nd light back on to give the images a different look/feel.
This is the 3rd shot I took of this style combination, the other 2 I don't like as much as this one, the 1st was too far zoomed out and therefore took away from it being about the products. The 2nd image the model was playing with her hair, and the light hitting it made it a bit to over exposed and again attracted away from the products being photographed.


1st image is to the left.
2nd image is to the right.


After doing a few shots with the red top we then took the bag out of the images, changed tops and added a necklace into the images.
So out of the jewellery supplied to me by my friend, we found this lovely heart shaped necklace, which went well with this top that the model brought along.
Again the light coming from the right, hitting and lighting up the models hair works well and makes these images stand out from the earlier ones that didn't have the other light in use.

Liking the outfit/necklace combination we tried various different poses, this one I like as the model is turned more towards the light, so more of her body is lit up, yet moving the arm position from behind her back to behind her head, created a nice shadowed area across her face, also a line across her chest where the light is lighting up the heart piece of the necklace well.
It is not so tightly framed but I think this also lends itself to the overall finish of the image.

This os the last shot we took with this outfit/jewellery combination, I wanted to get a full body shot so I have got the option of all the aspects of the shoot being available.
This will obviously require a crop in post production as the background scoop wasn't quite high enough and the top of it can be seen.

This is the next outfit change we went for a nice body sculptured dress, broken up with a red belt. We also changed the Jewellery again, this time to a nice multi coloured bracelet and almost matching necklace. This is the 1st shot we took and we were both fairly happy with the outcome, the only thing I wasn't sure about again was the background, it looked a little dark again.

In this image I moved the light coming from the right, so it was pointing further back behind the model and more onto the background scoop.
It has as I was hoping for lightened the background but not gone too far away from the model, so there is still the element of half light half shadow on the model herself.
The change of head position from looking at the camera to looking to the left slightly, has also created some nice shadows and well lit portions of her face/neck.

From the previous image I swapped back from Portrait to landscape, I did this as I want to try and concentrate more on the Jewellery, by getting the model to lean forward helped to move her hair from around the neck line, allowing the necklace to be seen.
Cutting the image off just below her hands, also helps draw your attention to the Bracelet.
There is of course the option of cropping this image down, so it becomes a head shot with the bottom of the image cut off just below the necklace.

This shot again I took inspiration from one of the research images, the result is pretty close, with again the only problem with the image being the background scoop being to low.
The image is designed to be advertising the bag, by putting it in an unusual position this helps make it stand out.

This is the final outfit change we went for, a nice black dress with a turquoise/ bluey green pattern/detail on the front, we went back to the 1st items of jewellery we used, using just the watch this time, as the colour of this matched the colours on the dress.
Although I like this shot, for the purpose of advertising the jewellery it wasn't quite the right pose.

I think in post production I will crop it slightly to remove the hand from the bottom left hand corner.

This is one of the last images, and the last pose of the shoot. I took this in both Landscape and Portrait framing.
From the previous images we added the black heart shaped necklace again. Shot in this way almost uses the rule of 2 thirds, yet the jewellery is still there and can be seen.